

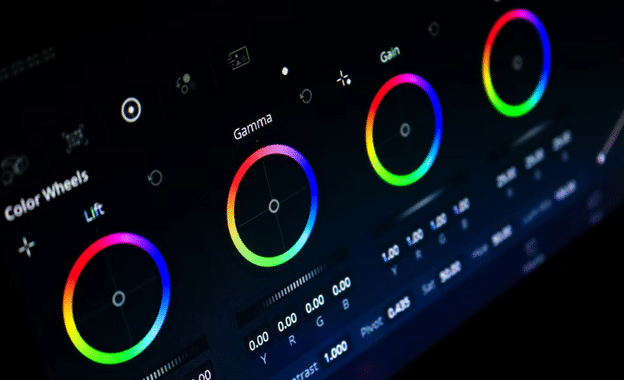
DaVinci Resolve is a professional video editing software that is perhaps best known for its color-correcting, color grading and visual effects capabilities. There are a number of different video editing software on the market today, but DaVinci Resolve remains an industry favorite. The software offers features that support creators looking for enhanced control over the aesthetic qualities of their projects.
A substantial amount of time, resources and effort go into producing and editing a video. As a result, creators are constantly searching for new ways to grow their audience and boost the reach of their content. One common method for increasing audience engagement is adding captions and subtitles to videos.
Tools like Verbit offer accurate, fast-turnaround captioning, subtitling and transcription solutions that can be easily integrated into post-production workflows, including those built around DaVinci Resolve. Read on to learn how to effectively incorporate captions into your DaVinci Resolve video projects.
Unlock accuracy, efficiency with Verbit’s self-service platform
Start your free trialTable of Contents:
- The Differences Between Captions and Subtitles
- Captions are an accessibility tool
- Subtitles are for non-native speakers
- How to Add Subtitles in DaVinci Resolve
- Can DaVinci Resolve Generate Subtitles?
- How to Add an SRT File to a Video in DaVinci Resolve
The Differences Between Captions and Subtitles
The term “captioning” generally refers to the process of converting audio into on-screen text. However, there are a few different styles of captioning. Creators can select the best option based on the specific needs of their various video projects. While many platforms and software use the terms “subtitles” and “captions” interchangeably, they’re actually two distinct forms of captioning.
Captions are an accessibility tool
Captions convey all audio elements of a video recording. In addition to the spoken text of a video, captions also represent non-speech audio elements like sound effects, laughter, pauses and more. Closed captions are captions viewers can enable and disable at will. In contrast, open captions are permanently included in a video file, and viewers can’t turn them on and off. Due to their comprehensive nature, captions are the best choice for creators who are focused on improving the accessibility of their content. For instance, captions are the right solution for improving access for individuals who are Deaf or hard of hearing.
Subtitles are for non-native speakers
Subtitles, on the other hand, only provide textual representations of spoken dialogue. For this reason, subtitles are good for viewers watching content in a non-native language. These viewers can hear the background noises and other audio elements. Subtitles don’t offer an equitable viewing experience for those with hearing loss because they leave those audio elements potentially preventing some viewers’ access to a video’s message or plot.
How to Add Subtitles in DaVinci Resolve
There are a few available methods for adding captions and subtitles in DaVinci Resolve. The first method is to add them manually within the editing software. Here’s how to add subtitles to a video manually in DaVinci Resolve:
- Right-click above the video track in your timeline and select Add Subtitle Track.
- Move the playhead to where you want your captions to start, right-click the subtitle track and select Add Subtitle.
- Select your subtitle and manually type your caption into the inspector.
- Adjust the length of your subtitle track to sync with the audio of your clip.
- Navigate to the Track Style tab to adjust your subtitle font, color, size and more.
- Repeat this process for the duration of the video.
As you can imagine, adding DaVinci Resolve subtitles manually can be a laborious and time-consuming process. Additionally, if the individual creating these DaVinci Resolve captions lacks adequate transcription training, the final project may contain a significant number of transcription errors. These errors can negatively impact video accessibility because they fail to provide sufficiently equitable experiences to viewers with certain disabilities.

Can DaVinci Resolve Generate Subtitles?
Some video platforms and media hosting sites use automatic speech recognition technology to automatically generate captions for video content. Unfortunately, DaVinci Resolve automatic subtitles are not currently available within the platform. This is also the case when adding captions in iMovie or generating Final Cut Pro subtitles. As a result, switching editing software is not necessarily the best solution for those seeking more efficient captioning workflows.
Anyone in need of an easier way to caption videos in DaVinci Resolve may want to consider partnering with a professional video captioning service like Verbit. Verbit uses both artificial intelligence and professional human transcribers to provide content creators with a high volume of accurate captions in as little as four hours.
When users upload a video to Verbit’s platform, our highly advanced artificial intelligence creates the first transcript draft. Verbit’s professionally trained human transcribers then review and make edits before converting the transcript into a caption file with accurate time codes that correspond to the video’s audio track. Users can then download their captions in a variety of file formats like SRT, SCC and WebVTT files. These formats are compatible with major video editing and hosting platforms. However, SRT files are particularly popular for captions and transcripts because their plain-text nature makes them compatible with many platforms.
How to Add an SRT File to a Video in DaVinci Resolve
If you have an existing SRT file and would like to use it to create DaVinci Resolve closed captions, you can do so within the DaVinci platform via the following steps:
- Under the File menu, select Import → Subtitle.
- Select your SRT file.
- Drag your subtitle file from the media pool to the corresponding location in your video’s timeline.
- Use the Track Style tab to make your desired adjustment to the font color and style.
Once a video is complete, creators can choose between burning their captions into the video permanently as open captions or exporting their captions as a separate sidecar file for use with media hosting platforms.
Start your Verbit free trial today
Sign Up Here!Optimize Your Workflows with Verbit
Video creators can save additional time and further streamline their workflows by waiting until after editing to caption their content. Rather than adding captions directly within DaVinci Resolve, creators can upload their finished videos to Verbit’s platform. Taking this approach will create caption files that are usable across various media platforms and social media networks.
Verbit offers convenient software integrations with sites like YouTube and Vimeo that save creators time during the captioning process. Captioning content for these platforms can increase average watch time and support audience members of diverse backgrounds and abilities. Reach out to learn more about how Verbit’s cost-effective captioning, transcription, translation and audio description services can help creators scale their production efforts without compromising on efficiency or accessibility.