
Create an Account
Begin by signing up for an account. Provide a few details, and you’ll get access to our services. Your account helps you manage all documents, follow the status of your orders, and receive notifications.
If you have questions or need assistance, you can reach out to our support team via email at support@verbit.ai or by initiating a chat through the Verbit Help Center.
How to Upload Files
Upload the media files you wish to caption and/or transcribe by clicking on the “Place order” button at the top right side of the screen. Our platform processes a variety of media formats easily; just select the file type to upload and we’ll take care of the rest.
After uploading a file, you will have the option to select the service that you prefer.
How to Download Completed Files
There are two ways to download files, in bulk or individually.
Downloading in Bulk: Click the button next to “Filename” at the top of the file table to select all files on screen. Go to the right side of the screen and press the “Download” button. Select between captions and transcripts, then you will receive a zip file with all requested files. Note: You can only download completed files.
Downloading Individual Files: To download an individual file, click it from the list, use the “Download” button at top right of screen, select desired output and click “download”.
How to Easily Edit Your Files
Click on the file that you want to edit, and it will open the text on the screen. You’ll then be able to interact with the text – click anywhere at any point, listen to the dialogue, and use your keyboard to delete and retype words as needed.
Inaudible Tags:
Your file may include inaudibles tags. Use the button at the top that says ‘Inaudibles’ to move between these tags. You’ll occassionally see “Inaudible” tags because Verbit transcribers are trained not to guess words that are not easily heard or understood as this can fundamentally change a sentence’s meaning.
Editing Tips:
- When editing with a colleague, feel free to use the comments button; you can leave a comment anywhere onscreen. This is used for someone else (or even yourself) as an indicator of where you left off.
- Find-and-Replace: Let’s say Speaker 1’s name is Gary – after writing their name under this specific speaker, you have an option of replacing all Speaker 1s with ‘Gary’. It’s an easy way to ensure speaker names are indicated accordingly without needing to replace them one by one!
Additional Services
If you are looking for additional services such as live captioning or transcription, translation, or audio description, click here and we will do our best to help you.
FAQs
Create an account
Sign up & Login:
- I would like to enter Verbit and order captions. What should I do?
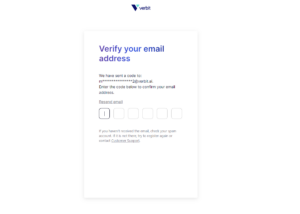
First, sign up to create an account. Once you have signed up, an authentication code will be sent to your email. Insert the code to complete your authentication step and enter the platform.

- Why can’t I complete my sign-up process?
If your sign-up is not going through (if the code hasn’t arrived) please check the following:- Make sure you have entered the correct email address.
- Currently, due to security reasons, registration is not possible via a VPN.
- I can’t log in to my account. What should I do?
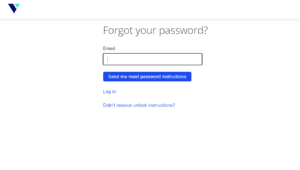
Make sure that you are entering the correct email and password. If you are still having trouble, try resetting your password. If the problem persists, contact the support team at support@verbit.ai. - I forgot my password. How can I reset it?
Click on the ‘Forgot Password’ option on the login page and follow the instructions to reset your password. You will need to enter your email address, and a link to reset your password will be sent to you.

Place an order
Submit an order form:
- What does the “There are no transcription jobs” message mean?
This message appears when you have not yet placed your first order. This is the “empty state” of the page. As soon as a job is ordered, it will be displayed on this page. - How do I place a new order?
To place an order, click on the “Place Order” button. You will need to upload your files and fill out the submission form: select the media source language (currently only English is supported), choose the service type, and then add any additional materials as desired before completing your payment. - How can I upload a file?
Once you click on the “Place Order” button, an upload box will open. Click on the “+” to choose a file from your device. - What file types are supported?
Currently, you can upload the following file types: MP3, MP4, FLAC, OGA, OGG, DSS, M4A, WAV, WEBM, and WMA. To learn more - In what language should my file be?
Currently, we are providing services for English files only. You will see in the submission form that the only available language under “Media source language” is English. - How long can my file be?
If you choose Auto or Pro service types, your file can be of any length.
If you choose Elite service types, your file can be up to three hours long - What size my file should be?
If you choose Auto or Pro service types, your file size can be up to 10GB max. To learn more
If you choose Elite or Pro service types, your file size can be up to 10GB max. To learn more - What type of service should I choose?
Auto: Recommended for single speaker recordings with high-quality audio
Pro: Recommended for recordings with 2 speakers
Elite: Recommended for recordings with multiple speakers, a variety of accents and complex subjects - What is the turnaround time for each service type?
Auto: Up to 2 hours
Pro: Up to 48 hours
Elite: Up to 5 days
If you require a different turnaround time please contact us at pricing@verbit.ai - Why and how should I add ‘Terms’ to my order?
Terms refer to any terminology that may be helpful while working on your file, such as niche or industry-specific words that may not be as familiar. You can add each term in a separate text box by clicking the “Add terms” button. - Why and how should I add ‘speaker names’ to my order?
We encourage you to provide speaker names to help your viewers identify them when engaging with your materials and to ensure that their names are spelled properly. You can add each speaker’s name in a separate text box by clicking the “Add Speaker” button. - Why and how should I use ‘Add files’ in my order?
You can add additional information when submitting a file by attaching relevant files for added context. The more context that is provided, the more accurate the output will be. You can add up to two to three files in the following formats: PDF, DOC, DOCX, TXT, PPT, XLSX. - Why and how should I add ‘additional instructions’ to my order?
You can add additional instructions when submitting a file by typing in notes for added context. This is highly encouraged, as the more context that is provided, the more accurate the technical output will be. Order instructions help us to caption your content more efficiently and accurately. - What are “Labels” and how to use it?
Labels are simply markers that help in categorizing jobs. They are especially useful in managing a huge number of jobs and searching for a specific set of jobs. You can add a label to each order you submit by typing its name into the “Labels” text box. - What are ‘Permissions’ and how to use it?
Permissions control user-to-job access using a permissive matching logic:- If a user has no user permission tag, they will have access to all existing jobs.
- If a job has no job permission tag, it will be accessible to all users.
In case your account has multiple users, you can add permissions to each order and control who will have access to it. Job permission tags can be added during manual upload in the “Permission” section of the order form.
Payment / Checkout page:
- How do I use the payment section?
You will need to enter your card number, expiration date, and CVC code. These are usually found on your credit or debit card. Additionally, you must provide your full name, as it appears on the card, and your billing address. After entering all the required information, you can click “Place order” to finish the transaction. - What if my payment is not going through?
If your payment is not going through, please check the following:- Currently, only credit cards from Canada and the US are supported.
- Ensure that the card number, expiry date, and CVC code have been entered correctly.
- Make sure that the name and address match those associated with the card.
- Check if your card has sufficient funds or credit to complete the purchase.
- If you’re still having trouble, you may want to contact your bank or card provider for further assistance.
- What is the CVC code, and where can I find it?
The CVC (Card Verification Code) is a security feature for card transactions; it’s a three-digit number located on the back of your card. - How secure is my payment and personal information?
We prioritize the security of your payments. All transactions are processed through a world-leading, certified third-party payment processor. We do not store your sensitive payment information on our servers, ensuring that your details are always kept secure throughout the transaction process.
Completed orders
Usage and output:
- Where can I see all my orders?
Once you submit an order, your order status will appear on the “All Orders” page. Once the order is completed, you will receive a dedicated email and the order status will change to “Finished.” - What output will I receive for Automatic service?
The automatic transcript will utilize Verbatim guidelines, with every utterance included but without speaker names. Each new speaker should be separated by a new line.
Example:
Thank you for, um, joining the call today.
I’m glad to be here. - What output will I receive for Pro service?
The Pro transcript will utilize Clean Read guidelines, omitting stutters, filler words, partial words, and false starts. Speaker names will appear on the left-hand side, indicating each new speaker.
Example:
John Smith: Thank you for joining the call today.
Alice Brown: I’m glad to be here. - What output will I receive for Elite service?
The Elite transcript will utilize Clean Verbatim guidelines, with stutters, filler words, and partial words omitted. Speaker names will appear on the left-hand side, indicating each new speaker.
Example:
John Smith: Thank you for joining the call today.
Alice Brown: I’m glad to be here. - Which file formats are available for download?
Transcripts: Plain Text, Docx, PDF, JSON, MDB, RTFT
Captions: SRT, VTT, DFXP, SAMI, SCC


